
So...Austin was in California last night and I was bored. I was looking online at randomness and came across a cute website that was a DIY dream (I can't for the life of me remember the site I was at but if I find it again then I'll link it here)! One of the projects involved Mod Podge shoes. I love Mod Podge, it's like a glue/sealer and I already had some at home so I thought I'd give some shoes a try for the big A&M v. Baylor game this weekend! After a trip to Wal-Mart to buy some super cheap shoes ($8) and search for some A&M fabric (which I couldn't find so I used a t-shirt) I was ready to start my project! 

I took pics of my project step-by-step so if you want to see that just let me know, otherwise I'll just leave the before and after pics here.
Anyways, here is the final product! B wanted to get in the picture too. :)

I have a few spots I need to touch up but they are pretty much done! Aggie football player on the left shoe and school name and symbol on the right. It took a while and some careful placing to get all that set up just right but I'm pretty happy with the end result!

What do you think?
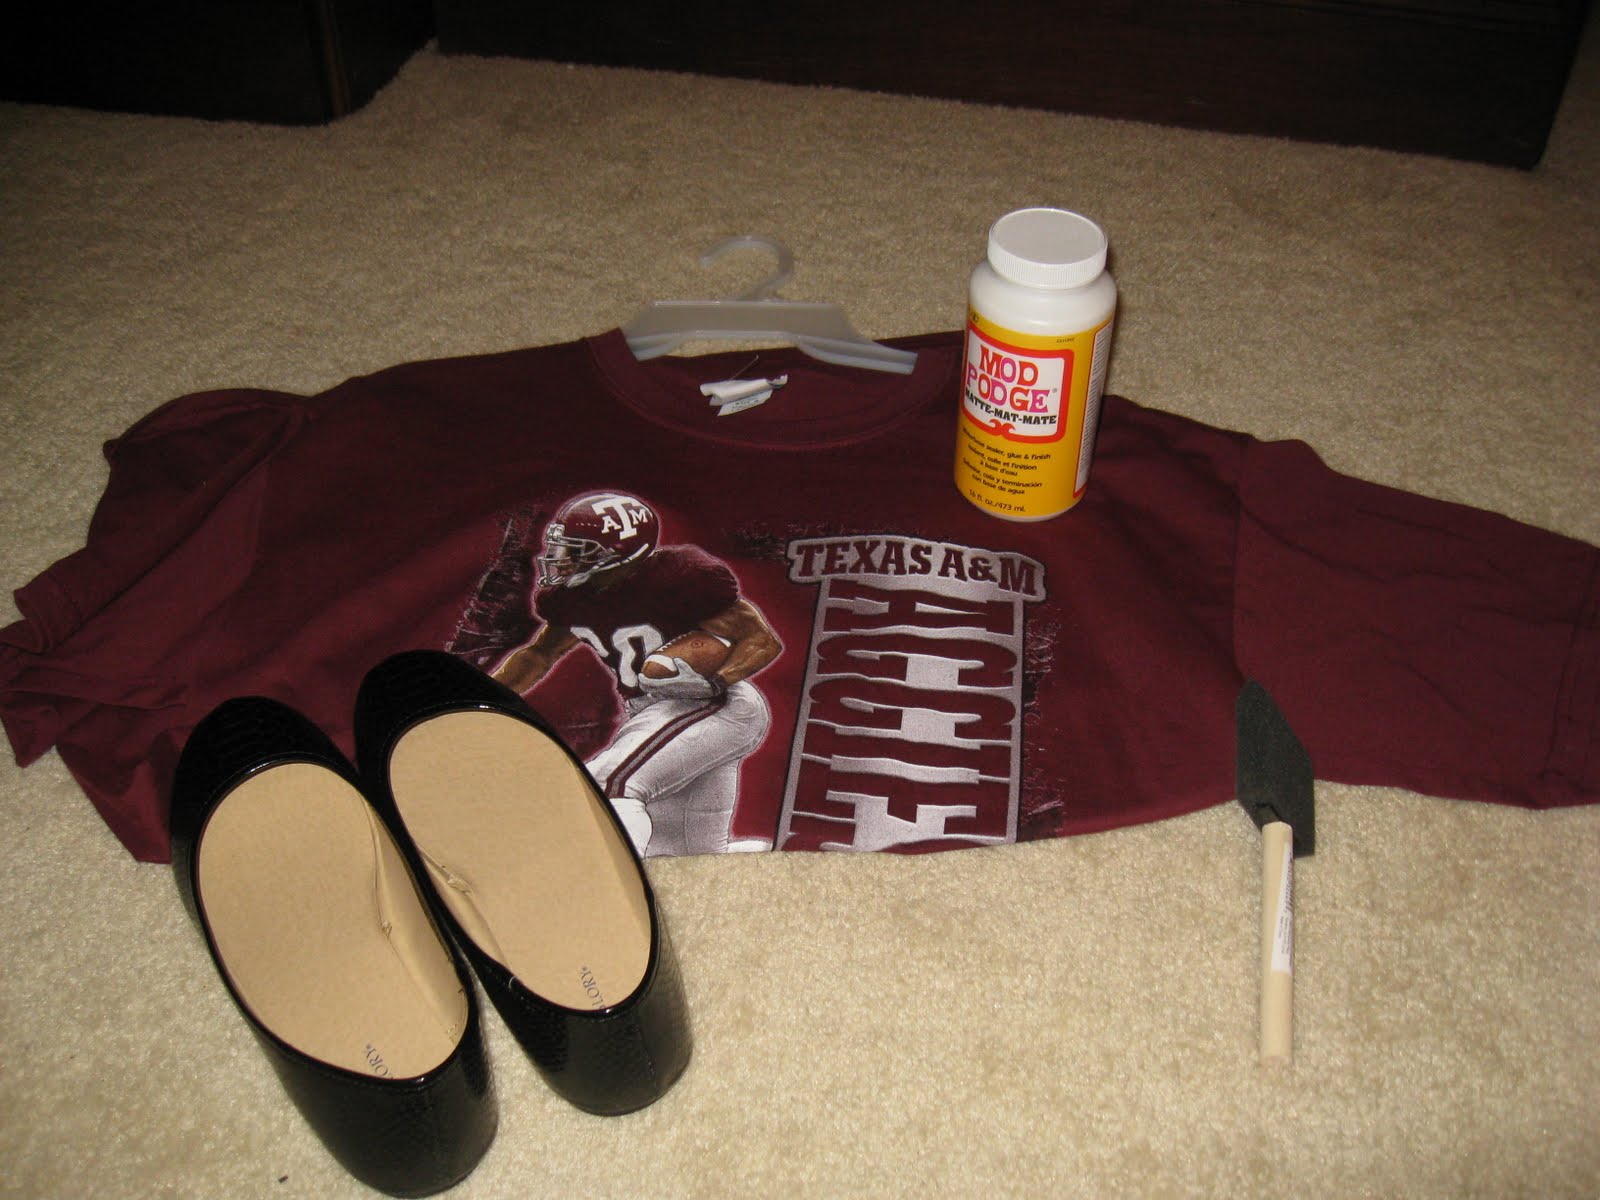
Here's the step-by-step of my project. This is for my girl Angela who's on bedrest with her TWINS!!! :)
Keep in mind this is the 1st time I've done this with shoes so it's not perfect, it's just the way I did it, I'm sure there is a much better way out there somewhere.
Start with a pair of cheap or old shoes, some Mod Podge, fabric and sponge brush.
Cut fabric (or tshirt in my case) to cover the shoe. Position the fabric how you'd like it to appear on your shoe before you cut it if it has a pattern like mine.

Cut a slit going from the back of the fabric almost to the front top part of the shoe

Apply a generous amount of Mod Podge to the front of the shoe and smooth out the fabric. You don't want any creases at the bottom where the shoe meets the sole. Continue on to the sides of the shoe.

Tuck in the back part of the fabric just a bit so that the frayed part isn't showing and Mod Podge it to the other piece in the back. Then cut slits in the curved part so that it lays flat under the top of the shoe.

Using the Mod Podge, tightly tuck in all sides. I'm sure this could have been neater but I didn't think about that at the time. Next time I will make the inside a little more nice looking.... Oops!
Using an exacto knife or something similar and sharp, trim up the bottom of the fabric so it's right at the edge.

Then Mod Podge the heck out of that thing! I saw somewhere that there is an Outdoor Mod Podge that would be good because it's water resistant but I didn't have that so oh well.

Finished product! This morning when I put them on after drying all night they were pretty stiff so I'll have to see what they end up like tonight.


3 comments:
The shoes look AWESOME!!!! Now make me some :) But not TAMU. :)
Very cute.. do want to see how they were done!! On the DIY website..?? cause Lord only knows I have time to search the web!!
SOOOOOO CUTE, WHAT A GREAT IDEA KELLY!
Post a Comment